
Breathing Styles
V0.145 playstyle loadouts (Water, Flame, Wind, and more), eight Lv25 trainers, and Final Selection.
By Bloxron Editorial Team · Last updated
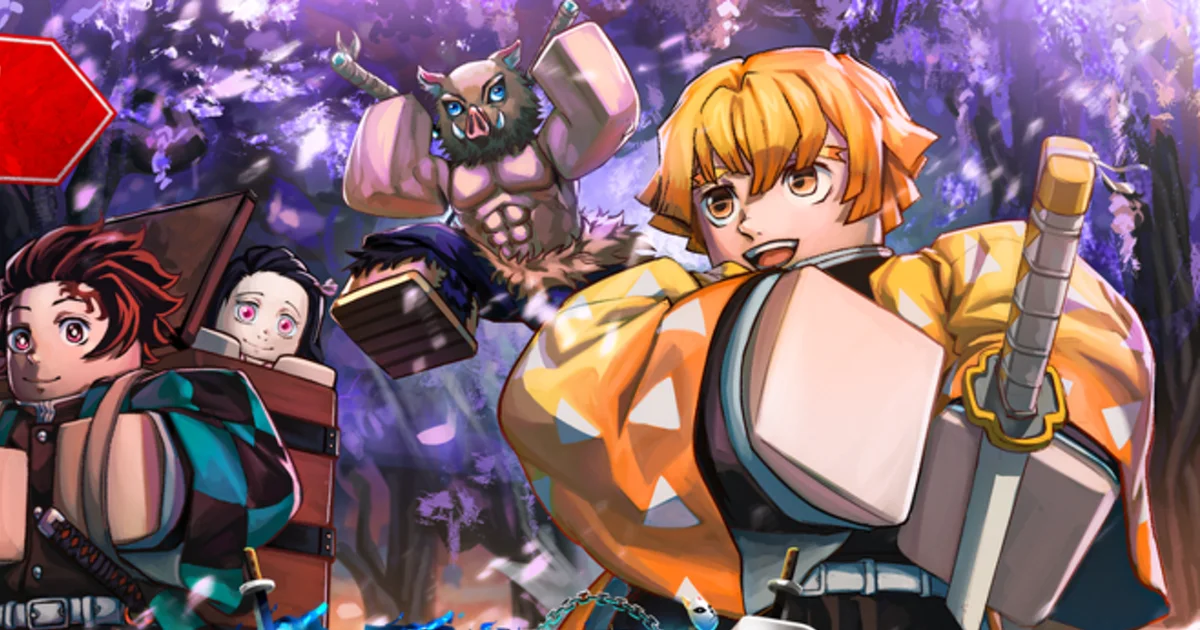
About Breathing Styles
Breathing Styles are the Slayer combat line. They are not given at character creation. Reach Lv25 on the Slayer path (not Demon), bring the mats your trainer asks for, finish the training quest, then unlock moves on the Skill Tree. Wall Climb opens several cliff trainers. Stone also needs Axe and Mace unlocked first.
Playstyle focus list
Eight styles cover different jobs. Water, Flame, and Wind are the broadest early V0.145 kits, with Thunder close behind after faster Clap and Flash casts. Stone is close-range bruiser work, Sound is space control, Serpent leans poison, and Insect needs clean stamina links. This is a playstyle map, not a letter tier list.
| Style | Playstyle | V0.145 note |
|---|---|---|
| Water | Consistent DPS and safer openings | Early overall pick. Whirl Pool was nerfed (exact values TBA); Water Wheel, Basin, and Surface Slash still carry the kit. |
| Flame | Sustained DPS and counter-burst | Broad counter-and-burst option that covers PvE and PvP without swapping kits. |
| Wind | Technical combo ceiling | Highest combo extension potential after faster starters; pairs hard with Shinazugawa. |
| Thunder | Burst damage and chase | Closed the gap after faster Thunder Clap / Flash and Rice Spirit casts with longer finish stuns. Rice Spirit no longer has strict stun and needs a short hold. |
| Stone | Close-range melee trades | Guard and bruiser value; second-hit guardbreak and armored ultimate help, but the counter returns less often. |
| Sound | Space control with explosive tools | Still a matchup specialist; Uzui's stronger damage mark helps offset reduced guard pressure. |
| Serpent | Poison and serpent-scaled weapons | Viable with Iguro; shorter poison and range lower consistency versus launch. |
| Insect | Mobility and fast combos | Execution-heavy after lost i-frames and a missing strict-stun confirm. Needs stamina and clean links. |
Combat rules that affect every style
Four shared rules hit every Breathing kit in V0.145: skill cooldowns are global (swapping tools no longer resets timers), every counter shares one cooldown across clan / Breathing / BDA / weapon, block regenerates during stuns and restarts from about 25% after a guardbreak stun ends (another hit cancels it), and Breathing / BDA / Fighting Style resets wipe invested skill points on that tree.
- Skill cooldowns are global — swapping tools no longer resets individual timers.
- Every counter shares one cooldown (clan, Breathing, BDA, and weapon counters).
- Block regenerates correctly during stuns. After a guardbreak stun ends, guard starts recharging from about 25%; another hit cancels the recharge.
- Breathing, BDA, and Fighting Style resets clear invested skill points on that tree.
Slayer loadout list
Each loadout pairs a clan, Breathing Style, weapon, and gear set for one job. Early V0.145 leans Water with Tomioka or Urokodaki, Flame with Rengoku, Wind with Shinazugawa, and Thunder with Agatsuma. Nightfall Katana often adds about +5.75 Additional Damage and 1.14x ADF when you have the schematic. These are starting packages by playstyle, not ranked letter tiers.
Nightfall schematic routes are on the Nightfall page. Clan keep odds are on Clans.
Slayer weapon notes
Four Slayer weapon notes while a Breathing questline finishes. Firstlight Tanto stays the safe all-rounder for damage, block, and quick M1s. Firstlight Spear adds reach and AoE (Spear Z is hyper armor, not i-frames). Lost Shotgun leans PvE catches. Nightfall Katana takes over conventional sword stats once you have the Mistfall Harbor schematic and Togane forge open.
- Firstlight Tanto: safest all-round Slayer weapon (damage, block, quick M1s, easy routing).
- Firstlight Spear: better reach and AoE for PvP and bosses; Spear Z is hyper armor, not i-frames.
- Lost Shotgun: PvE-leaning catches and fast attacks.
- Nightfall Katana: strongest conventional sword stats once you have the schematic.
Water flow
Sustained DPS · PvE, learning fights, early overall Slayer pick
| Clan | Tomioka (Urokodaki as alternate) |
| Breathing | Water |
| Weapon | Firstlight Tanto, Tidal Katana, or Nightfall Katana |
| Gear | Nightfall Top · Demonic Horn II · Water Haori or Fractured Web Kata-Aki · Red Oni Mask (or any Duelist set) |
Early V0.145 overall Breathing pick. Tomioka favors active reset rotations; Urokodaki leans passive damage, mask defense, and smoother progression. Whirl Pool was nerfed, but Water Wheel still carries held sequences with tap strict stun, Basin remains a strong catch, and Surface Slash keeps approach i-frames. Firstlight Tanto is the safest universal weapon; Tidal leans utility; Nightfall Katana leans raw sword stats.
Trades Flame / Thunder peak burst for control. Exact Whirl Pool nerf numbers remain TBA.
Flame inferno
High sustained DPS · PvE and PvP without swapping kits
| Clan | Rengoku |
| Breathing | Flame |
| Weapon | Nightfall Katana or Firstlight Tanto |
| Gear | Nightfall Top · Demonic Horns · Flame Haori Style I · Bamboo Muzzle (or any Duelist set) |
Rengoku scales offense with Flame's improved counter and pressure plus burn. Nightfall Katana adds raw Additional Damage and a 1.14x Additional Damage Factor; Firstlight Tanto is the easier all-round M1 route. One loadout covers grinding and PvP pressure.
Less pure burst than Thunder and less block cushion than Water or Stone — you win by staying on offense.
Wind combo
Technical combo DPS · Players who convert extensions cleanly
| Clan | Shinazugawa |
| Breathing | Wind |
| Weapon | Firstlight Tanto or Nightfall Katana |
| Gear | Any Duelist / Technician set that stacks damage and stamina |
Post-patch specialist. Faster starters and better extensions make Shinazugawa's damage and stamina bonuses easier to convert. Highest technical combo ceiling among Breathing kits.
Punishes messy links. Less forgiving than Water or Flame if you drop the string.
Thunder burst
Burst DPS · PvP and short damage windows
| Clan | Agatsuma |
| Breathing | Thunder |
| Weapon | Nightfall Katana or Firstlight Tanto |
| Gear | Reaper's Outfit · Golden Kanzashi · Flame Haori Style II · Nightfall Mask (or any Duelist / Technician set) |
Agatsuma pairs cleanly with Thunder. V0.145 faster casts and longer finish stuns restore much of the pursuit threat. Open hard, dump a short burst, then reset. Confirm Rice Spirit after its short hold — it no longer has strict stun.
Needs timing. Spamming the same open lets experienced players punish recovery. Godspeed is slower than at launch.
Stone close-range
Close-combat DPS · PvP melee trades
| Clan | Himejima |
| Breathing | Stone |
| Weapon | Nightfall Axe & Mace |
| Gear | Black Dragon Armour · Demonic Horn II · Stone Haori · Envoy of Night Mask or Bamboo Muzzle (or Duelist / Tank gear) |
Himejima still delivers a strong defensive package (damage mark, Block Points, health, stamina, damage reduction) despite earlier nerfs. Stone gains a second-hit guardbreak and an armored ultimate. Nightfall Axe & Mace stacks block and damage reduction for longer trades.
Slow attack speed. Shared counter cooldown means the defensive turn returns less often than at launch.
Sound mark
Space control · PvP with mark setups
| Clan | Uzui |
| Breathing | Sound |
| Weapon | Firstlight Spear or Firstlight Tanto |
| Gear | Any Duelist set; lean block when Sound's guard pressure feels light |
Uzui's stronger 25% damage mark and simpler Musical Score capture help offset Sound's reduced guard pressure. Firstlight Spear adds reach and AoE when you need space; Spear Z now uses hyper armor rather than i-frames, so trades still cost health.
Less raw guard pressure than at launch. Mark value drops if you never land the setup.
Insect poison
Agile DPS · PvP and fast combos
| Clan | Kocho |
| Breathing | Insect |
| Weapon | Firstlight Insect Katana |
| Gear | Reaper's Outfit · Golden Kanzashi · Lost Cape · Golden Folk Mask (or any Duelist / Technician set) |
Kocho is the natural Insect pairing. Firstlight Insect Katana keeps the kit style-locked (+4 Additional Damage, +5 Stamina, 1.12x Movement Speed). Golden Kanzashi and Golden Folk Mask favor air approaches and short reposition bursts.
More execution than the other packages. Lost i-frames and a missing strict-stun confirm make missed links costly.
Breathing trainer table
All eight trainers need Lv25 on the Slayer path. Water: 5,000 Wen and 30 Demon Horns. Wind: 50 Demon Horns. Flame, Thunder, and Sound: 10 Demon Horns each. Serpent: 20 Demon Horns and 5 Beast Cores. Stone: Axe and Mace unlocked. Insect horn and Wen costs are not listed. Wall Climb is required for Zentaro, Tengai, and Obari. Iceveil drains health on the Saneri and Tengai walk — use a campfire or Emberheart Lantern. Love and Beast are not among these eight yet.
| Trainer | Style | Location | Extra cost |
|---|---|---|---|
| Obari | Serpent | Cliffs north of Windy Peak on the Bamboo Grove-facing side — Wall Climb required | 20 Demon Horns, 5 Beast Cores; Wall Climb |
| Gyorei | Stone | Stone Sanctuary on the lower path from the bear area (stay low — the uphill peak is Thunder) | Axe and Mace unlocked |
| Zentaro | Thunder | Highest peak above Hidden Mist Village, uphill past the bear area — Wall Climb required | 10 Demon Horns; Wall Climb |
| Rengu | Flame | Roof by the long red bridge out of Mistfall Village toward the Forgotten Ruins | 10 Demon Horns |
| Shinora | Insect | Roof of the main building at Butterfly Estate | Horn and Wen costs not listed — read the trainer card |
| Urokodaki | Water | Underwater passage by the island house near the Bamboo Grove waterfall — keep moving so you do not drown | 5,000 Wen, 30 Demon Horns |
| Saneri | Wind | Iceveil Valley water platform along the fallen tree by the shrine — valley drains health until campfire or Emberheart Lantern | 50 Demon Horns |
| Tengai | Sound | Small island north of the Iceveil Valley shrine — Wall Climb; same cold drain as Saneri | 10 Demon Horns; Wall Climb |
Demon Horns and Beast Cores farm list
Unlock Wall Climb and Double Jump before cliff trainers, then farm the exact mats on the trainer card. Demon Horns: Hoyuzo Subordinates in the Mother Bear cave for a steady low-level stack, or High Demons on upper snowy ledges for about 2 horns each. Beast Cores: Beast Born Demons at Mistfall Harbor's village gate at night (Stone / Serpent). Talk to the trainer, not the Trainee — wrong NPC stalls the questline.
- Unlock Wall Climb and Double Jump before mountain or cliff trainers. Zentaro, Tengai, and Obari all need Wall Climb.
- Trainer starts the questline; the Trainee is a separate combat encounter — talking to the wrong NPC stalls the quest.
- Horn, Beast Core, and Wen bills differ by style. Bring only what that trainer lists.
- Demon Horns: farm Hoyuzo Subordinates in the cave near Mother Bear for a steady low-level stack.
- Faster horns: High Demons on the upper snowy ledges can drop 2 horns each, but they fight back with Demon Arts.
- Beast Cores: farm Beast Born Demons around Mistfall Harbor's village gate at night (Serpent / Obari).
- Iceveil Valley drains health on the walk to Saneri and Tengai — use a campfire or Emberheart Lantern.
- Several trainers sit on roofs, cliffs, or behind water. Check height and underwater routes before you assume the NPC is missing.
How training works
Breathing Styles unlock through a trainer questline, not by standing near an NPC. Reach Lv25 on the Slayer path, bring the style's materials, talk to the trainer (not the Trainee), clear the minigames, beat the Trainee boss, then spend Skill Points on Z/X/C/V/B in the Skill Tree.
Talk with materials ready
Speak to the trainer (not the Trainee) with the required items already in inventory. The trainer starts a questline. Standing nearby does not grant the style by itself.
Clear the training minigames
Short drills such as aim targets, barrel jumps, and rolling boulders. Failures are repeatable.
Beat the Trainee boss
The closing fight converts training into the style. If Z/X/C/V/B are still empty, the questline is not finished.
Spend Skill Points on moves
Open the M menu Skill Tree and unlock individual abilities. A finished style binds five moves to Z, X, C, V, and B.
After your first style
After your first style, practice the five-key moveset and aim at Final Selection from Lv45 (about Lv60 recommended solo). Full exam quest order, Crow / Ren / Ginzo, and the post-exam loop are on the Beginner guide. Forge recipes and Nightfall schematics are on the Nightfall page.
Full Final Selection quest order and post-exam steps are on the Beginner guide. Style keep clans are on the clans page.
Breathing FAQ
How does training work in Slayers 2?
See How training works above. Demons use Blood Demon Art Core Training instead.
What level do I need for a Breathing Style?
Lv25 for every trainer, plus that style's materials or unlocks. Demons use Blood Demon Arts instead.
What is the strongest Breathing Style right now?
Early V0.145, Water is the most dependable complete kit, with Flame and Wind close beside it. Thunder is the nearest challenger after faster casts and longer finish stuns. Whirl Pool was nerfed; exact values are still TBA.
Which Slayer loadout should I run?
Match the job you want. Details are under Slayer loadouts by playstyle on this page.
What weapon should Slayers craft first?
Firstlight Tanto is the safest all-round pick. Nightfall Katana is the strongest conventional sword once you have the schematic. Firstlight Spear when reach and AoE matter more.
Which build is best for beginners?
Tomioka or Urokodaki with Water. Defensive and recovery tools let you learn attack patterns without melting when you mistime a punish.
Which Breathing Style is cheapest to unlock?
Flame from Rengu asks for 10 Demon Horns, the lowest horn cost on the list. Stone skips horn costs but needs Axe and Mace unlocked.
Which style costs the most Demon Horns?
Wind from Saneri asks for 50 Demon Horns. Farm before you travel to the snowy water platform.
Why can't I reach a trainer?
Unlock Wall Climb for cliff and peak routes (Thunder, Sound). Water uses an underwater passage — keep swimming. Flame and Insect sit on roofs. Check height before you assume the NPC is missing.
Trainer quest will not start — what am I doing wrong?
Make sure you are talking to the trainer, not the Trainee combat NPC. Bring the listed mats, read the dialogue for any extra fee, and finish earlier quest handoffs if the Book of Guidance still points elsewhere.
What comes after my first Breathing Style?
Final Selection from Lv45 (about Lv60 recommended solo). Full exam and post-exam steps are on the Beginner guide; Forge and schematics are on Nightfall.
Are Love Breathing or Beast Breathing in the game?
Not yet. As of early October 2026 only the eight live trainers on this page unlock styles. Love and Beast remain Update 1 teases — do not spend mats hunting missing NPCs for them.